How to plug a tyre puncture at the roadside (and when you must not)
This is how to plug a car tyre puncture at the side of the road with a cheap plug kit, step by step. And just as important, when you must not.
🎬 The video of this job goes live on our YouTube channel on Sunday, 6 December.
Parts and tools
eBay.ie searches: check the part fits your car (by registration or part number) before you buy. These are eBay Partner Network links: the site may earn a small commission, at no extra cost to you.
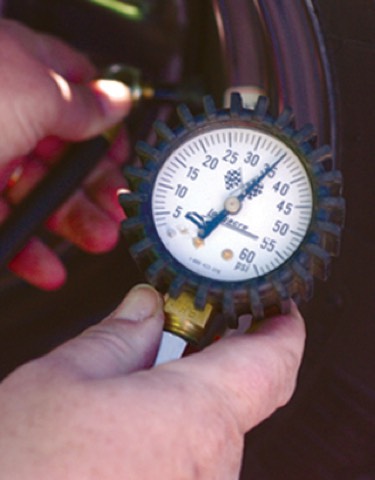 Tyre pressure gaugeSee on eBay.ie →
Example photos, not the exact part (Wikimedia Commons): (U.S. Air Force photo by Airman Frank Snider), Public domain.
Before you start: Can it be plugged?
First, can it be plugged? Only a small hole in the middle of the tread, no bigger than 6 millimetres, like a nail or a screw. Never the shoulder or the sidewall. And if you've driven on it flat, the inside may be wrecked, so don't plug it.
Safety: Somewhere safe first
Safety. On a motorway or a busy road, don't try to fix it there. Pull right in, switch on your hazard lights, get out on the side away from the traffic, wait behind the barrier, and call for help.
The kit and extras
The kit: a reamer, an insertion needle, rubber plug strings, and in some kits, rubber cement. You'll also need pliers, a knife, a 12-volt compressor, and a little soapy water.
- Reamer + insertion needle: Clean the hole, push the plug
- Plug strings (+ cement): Rubber cement in some kits
- Pliers + knife: Object out, trim the plug
- 12-volt compressor + soapy water: Pump it up, check for leaks
Step 1: Find the hole
Find the hole. Look for the nail or screw, and if you can't see it, wet the tread with soapy water and watch for bubbles.
Step 2: Object out
Pull the object out with the pliers.
Step 3: Ream the hole
Straight away, push the reamer into the hole, and work it in and out until it moves freely. That cleans the hole and gets it ready for the plug.
Step 4: Load the plug
Thread a plug string through the eye of the needle, so it sits in the middle. If your kit has rubber cement, coat the plug.
Step 5: Plug in, needle out
Push the needle into the hole, then pull it straight back out. The needle comes out, and the plug stays in.
Step 6: Trim the ends
Trim the ends. Most kits say cut them flush with the tread, some say leave a little: follow your kit.
Step 7: Pump it up, check for leaks
Pump the tyre back up to the right pressure for your car. It's in the handbook. Then check the plug with soapy water. No bubbles means it's sealed. If it still bubbles, put in another plug.
Step 8: Temporary: tyre shop next
A plug is only a temporary fix to get you home. Drive gently to a tyre shop. They need to take the tyre off the wheel and check the inside, then repair it properly or replace it.
Figures and where they come from
Every figure in this guide is checked against at least two independent sources. Where sources disagree, we say so.
- Only small punctures in the central tread can be repaired, no bigger than 6 mm; never the shoulder or sidewall.
Sources
- Pirelli UK 'Tyre puncture repair' (central T area only; max 6 mm; not near the sidewall; BS AU 159)
- Continental UK 'Tyre repair' (tread punctures of 6 mm or less; sidewall not repairable)
- national.co.uk / BS AU 159 summaries (central band, under 6 mm)
- Driving on a flat tyre can wreck it inside so it can't be repaired.
Sources
- Michelin 'Flat tire' advice (driving even a short distance flat can destroy the tire internally)
- Continental 'Tyre repair' (sidewall pinched between rim and road)
- Pirelli UK (not safe to drive on a flat)
- Motorway/busy road: hard shoulder only in an emergency, pull right in, hazard lights, call for help, wait somewhere safe; don't attempt repairs there.
Sources
- RSA Ireland, Motorway Safety (hard shoulder only in an emergency, pull in, hazard lights, call for help, wait at a safe place; leave by the doors away from traffic, behind the crash barrier)
- AA Ireland 'Motorway breakdown: what to do' (don't attempt even simple repairs; behind a barrier)
- Plug kit steps: pull the object out, ream the hole, load the plug in the needle (cement if supplied), push in, pull the needle out leaving the plug, trim, reinflate, check with soapy water; another plug if it still bubbles.
Sources
- unsealed4x4.com.au step-by-step tyre plug guide
- autoexpert.com.au 'Fast flat tyre repair using a plug kit'
- 4x4australia.com.au 'How to plug a tyre'
- NAPA Know How 'How to use a tire plug kit the right way'
- Trim the ends: flush in most kits, a few mm proud in others: follow your kit.
Sources
- unsealed4x4.com.au (trim flush)
- BCF plug kit instructions (cut about 3 mm from the carcass)
- A plug is a temporary get-you-home fix; a proper repair means taking the tyre off the wheel to check the inside.
Sources
- national.co.uk puncture repairs (wheel removed to inspect inside and out)
- Start Rescue 'Is my tyre repairable' (inside damage can't be seen from outside)
- Lazada auto guides (string plug: temporary, inspect internally)
- autoexpert.com.au (not a substitute for a spare)
- You need a way to pump it back up: a 12-volt compressor.
Sources
- autoexpert.com.au (a compressor is needed to reinflate)
- unsealed4x4.com.au (reinflate with a compressor)
A guide, not advice on any one car. If in doubt, use a garage. More DIY guides.