VW Golf Mk7 front brake pads and discs: step by step, with torque settings
This is how to change the front brake pads and discs on a Mk7 Volkswagen Golf, step by step, with the torque settings, and the one check you must never skip before you drive off.
🎬 The video of this job goes live on our YouTube channel on Sunday, 22 November.
Parts and tools
eBay.ie searches: check the part fits your car (by registration or part number) before you buy. These are eBay Partner Network links: the site may earn a small commission, at no extra cost to you.
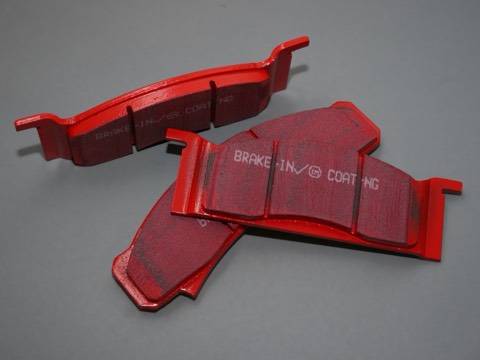 Front discs and pads (check 276, 288 or 312 mm)See on eBay.ie →Front pads (if your discs are still in spec)See on eBay.ie →
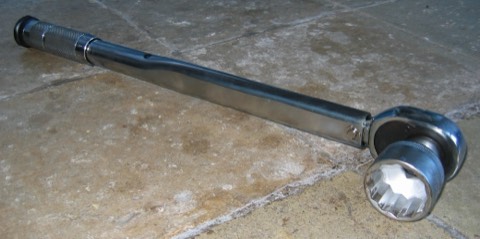 Torque wrenchSee on eBay.ie →🔧Brake cleanerSee on eBay.ie →
Example photos, not the exact part (Wikimedia Commons): Treemonster86, CC BY-SA 3.0; Heron2 (assumed author), CC BY-SA 3.0.
Before you start: Front brakes only
This is the front brakes only. Unlike the rear, the fronts don't need the electric parking brake put into service mode. Front discs on a Mk7 can be 276, 288 or 312 millimetres, so order your parts by registration.
Parts
Fit new pads whenever you fit new discs, and always do both sides together, so the car brakes evenly. You'll also want brake cleaner and anti-squeal paste.
- Brake discs (pair): Both sides, by registration
- Brake pads (set): Always new with new discs
- Brake cleaner + anti-squeal paste: For the hub and pad backs
Tools
Tools: a 17 millimetre wheel socket, a 13 millimetre socket and a 17 millimetre spanner for the caliper, a T30 Torx bit, a socket for the carrier bolts, a piston wind-back tool, a torque wrench, a wire brush, and axle stands.
- Sockets + spanner: 17 mm wheel · 13 mm + 17 mm caliper
- T30 Torx bit: Disc screw
- Wind-back tool + torque wrench: Piston, and every bolt
- Axle stands: Never just a jack
Safety: Chock, loosen, lift
Chock the rear wheels, open the bonnet and take the cap off the brake fluid reservoir. Loosen the wheel bolts with the car on the ground, then lift the front and set it on axle stands.
Step 1: Wheel off
Take off the wheel bolts and the wheel. Hold the wheel as the last bolt comes out.
Step 2: Undo the caliper bolts
Clean the two caliper guide bolts at the back. Undo them with the 13 millimetre socket, holding the guide pin with the 17 millimetre spanner.
Step 2: Caliper off, tied up
Lever the pads apart a little and lift the caliper off. Tie it up out of the way. Never let it hang on the brake hose, and don't press the brake pedal while it's off.
Step 3: Old pads and carrier off
Take out the old pads. Then undo the two big bolts at the back of the carrier, and take the carrier off.
Step 4: Old disc off, clean the hub
Undo the small T30 screw that holds the disc, and tap the disc off with a rubber mallet. Clean the hub face with a wire brush, so the new disc sits perfectly flat.
Step 5: New disc, carrier back on
Fit the new disc and its screw, tightened to 8 newton metres. Clean the carrier, check the guide pins and boots, and bolt it back on. 190 newton metres is the figure given for this car, but figures differ between versions, so check yours.
Step 6: Push the piston back
Clean the caliper piston, then push it back in, slowly, with the wind-back tool. The fluid in the reservoir will rise as it goes back, so keep an eye on it.
Step 7: New pads, caliper back on
Put a thin layer of anti-squeal paste where the pad backs touch the carrier, never on the friction side. Fit the new pads, refit the caliper, and tighten the guide bolts. 35 newton metres is the usual figure, 30 on some calipers.
Step 8: Wheel on, torque it
Spray the disc clean with brake cleaner. Refit the wheel, lower the car, and tighten the wheel bolts across in a star, to 120 newton metres.
Step 9: Pump the pedal: firm before you move
Before the car moves, with the engine off, pump the brake pedal until it feels firm. Then check the fluid level, top up if needed, and put the cap back on.
Afterwards: Other side, then go easy
Do the other side the same way. New pads and discs can feel different at first, so take it easy and follow the pad maker's bedding-in advice.
Figures and where they come from
Every figure in this guide is checked against at least two independent sources. Where sources disagree, we say so.
- Mk7 front discs come in 276, 288 or 312 mm depending on the car (PR code): order by registration.
Sources
- Brembo catalogue, Golf VII (276 mm and 288 mm listings)
- carunited.co.uk Golf brake discs guide (288 or 312 mm for TSI models)
- autodoc.co.uk Golf Mk7 1.4 TSI brake discs (276 mm and 288 mm by PR code; 312 x 25 listed for Golf 7)
- Caliper guide bolts: 13 mm socket, holding the guide pin with a 17 mm spanner; wheel bolts 17 mm.
Sources
- AUTODOC Golf 7 front disc guide (socket 13, spanner 17, wheel socket 17)
- onemandiy.com Mk7 Golf brake service (13 mm and 17 mm wrenches, 17 mm wheel socket)
- Disc retaining screw: T30 Torx.
Sources
- AUTODOC Golf 7 front disc guide (Torx T30)
- onemandiy.com (T30 Torx bit)
- vwroc.com forum ('a Torx bit for the disc')
- Disc retaining screw 8 Nm.
Sources
- AUTODOC Golf 7 front disc guide (8 Nm)
- onemandiy.com quoting the 2015 Golf Mk7 manual (8 Nm)
- Front caliper carrier bolts 190 Nm (some sources differ: check yours).
Sources
- AUTODOC Golf 7 front disc guide (190 Nm)
- tighttorque.com Golf Mk7 (190 Nm front bracket)
- differs: volkswagenforum.co.uk (200 Nm), onemandiy.com (90 Nm + 90°)
- Caliper guide bolts 35 Nm (30 Nm on some calipers).
Sources
- AUTODOC Golf 7 front disc and pad guides (35 Nm)
- onemandiy.com quoting the 2015 manual (35 Nm)
- tighttorque.com (30 or 35 Nm by guide pin type)
- Wheel bolts 120 Nm, in a cross pattern, car on the ground.
Sources
- AUTODOC Golf 7 front disc guide (120 Nm, cross order)
- sp-performance.com 2016 Golf pad guide (120 Nm)
- onemandiy.com quoting the 2015 manual (119 Nm)
A guide, not advice on any one car. If in doubt, use a garage. NCT record and typical prices for this car. More DIY guides.