Toyota Corolla Hybrid (E210) front brake pads: step by step, with the hybrid safety step
This is how to change the front brake pads on a Toyota Corolla Hybrid, the E210, step by step, with the torque settings, and the hybrid safety step most guides leave out.
🎬 The video of this job goes live on our YouTube channel on Sunday, 29 November.
Parts and tools
eBay.ie searches: check the part fits your car (by registration or part number) before you buy. These are eBay Partner Network links: the site may earn a small commission, at no extra cost to you.
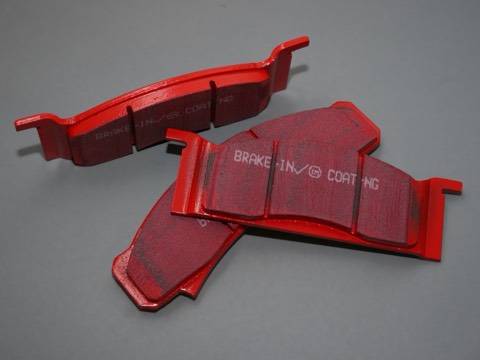 Front brake padsSee on eBay.ie →🔧Brake pad piston wind-back toolSee on eBay.ie →
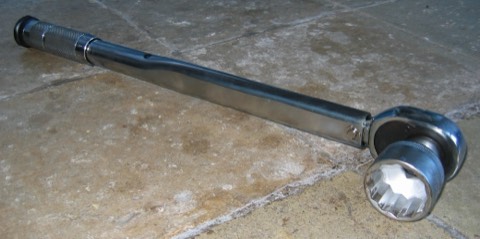 Torque wrenchSee on eBay.ie →🔧Brake cleanerSee on eBay.ie →
Example photos, not the exact part (Wikimedia Commons): Treemonster86, CC BY-SA 3.0; Heron2 (assumed author), CC BY-SA 3.0.
Before you start: Front pads only
This is the front pads only. The fronts don't need the electric parking brake put into service mode. The rears do, so they're a different job.
Hybrid safety: Let the brake pump settle
Here's the hybrid part. The Corolla Hybrid has an electric brake pump that stores pressure in the system. So switch the car off, and close the doors. Wait about a minute, until you hear the pump run and stop.
Hybrid safety: 12-volt battery: negative off
Then disconnect the negative lead on the 12-volt battery. On the 1.8 it's under the bonnet. And don't press the brake pedal while you work.
Parts
Parts: a set of front pads, for both sides, brake cleaner, and a little anti-squeal paste.
- Front brake pads (set): Both sides, by registration
- Brake cleaner: Disc and carrier
- Anti-squeal paste: Pad backs only
Tools
Tools: a 21 millimetre wheel socket, a 14 millimetre socket for the caliper, a piston wind-back tool, a torque wrench, a wire brush, and axle stands.
- Sockets: 21 mm wheel · 14 mm caliper
- Wind-back tool + torque wrench: Piston, and every bolt
- Wire brush: Carrier and pad slots
- Axle stands: Never just a jack
Safety: Chock, loosen, lift
Chock the rear wheels. Loosen the wheel nuts with the car on the ground, then lift the front and set it on axle stands.
Step 1: Wheel off
Take off the wheel nuts and the wheel. Hold the wheel as the last nut comes off.
Step 2: Caliper off, tied up
Clean the two slide pin bolts at the back of the caliper, and undo them with the 14 millimetre socket. Lift the caliper off, and tie it up. Never let it hang on the brake hose.
Step 3: Old pads out, check the disc
Take out the old pads. Check the disc. The minimum thickness is stamped on it, usually 19 millimetres on this car. If it's thinner, or badly worn, fit new discs as well.
Step 4: Clean the carrier
Clean the carrier where the pads sit with the wire brush and brake cleaner. Put a thin layer of anti-squeal paste on the pad backs, never on the friction side.
Step 5: Push the piston back
Clean the caliper piston, then push it back in slowly with the wind-back tool. The fluid in the reservoir will rise as it goes back, so don't let it overflow.
Step 6: New pads, caliper back on
Fit the new pads, refit the caliper, and tighten the slide pin bolts to 35 newton metres. Some manuals say 34.
Step 7: Wheel on, torque it
Spray the disc clean with brake cleaner. Refit the wheel, lower the car, and tighten the wheel nuts across in a star, to 103 newton metres.
Step 8: Pedal firm before you move
With the battery still off, press the pedal a few times to bring the pistons out. Reconnect the battery. The pump will run: leave the pedal alone until it stops. Then press it again. It must feel firm before the car moves. Check the fluid level.
Afterwards: Other side, then go easy
Do the other side the same way. Take it easy for the first 150 to 200 kilometres, while the new pads bed in.
Figures and where they come from
Every figure in this guide is checked against at least two independent sources. Where sources disagree, we say so.
- Corolla Hybrid brakes use an electric brake booster pump with an accumulator that holds pressure; switch the power off before work.
Sources
- Toyota service bulletin for 2020 Corolla Hybrid filed with NHTSA (RCRIT-19V544): 'Brake Pump Assy w/ Accumulator', 'Confirm the Power Switch is OFF'
- Toyota Owners Club, 'Corolla 2019 brake job' (1.8 hybrid): system must be depressurised; pump runs about a minute after switch-off; don't press pedal or push pistons while it pressurises
- Disconnect the 12-volt battery negative after the pump stops; on the 1.8 the battery is under the bonnet (2.0 in the boot).
Sources
- Toyota Owners Club 'Corolla 2019 brake job' (two members: wait for depressurise, then disconnect negative; '1.8 in the engine bay, 2.0 in the trunk')
- Toyota Owners Club '1.8L vs 2.0L 12v battery' (1.8 under the bonnet, 2.0 in the boot)
- Toyota Owners Club Yaris hybrid thread (let it depressurise before disconnecting; don't open the driver's door with the battery connected)
- Fronts don't need the electric parking brake service mode; rear calipers do.
Sources
- Toyota Owners Club 'Corolla 2019 brake job' ('for front discs and pads you don't need anything except system depressurised'; rear needs service mode)
- paulstravelpictures.com 12th-gen Corolla rear pads guide (EPB must be retracted for rears)
- Caliper bolts 14 mm socket; wheel nuts 21 mm.
Sources
- AUTODOC Corolla XII (E210) front pad guide (drive socket 14, wheel socket 21)
- sp-performance.com / HowToo 2020-21 Corolla front brakes (14 mm slide-pin bolts)
- wheelssize.com Corolla (M12 x 1.5 nuts, 21 mm hex)
- Caliper slide-pin bolts 35 Nm (34 Nm in some manuals).
Sources
- AUTODOC Corolla XII (E210) front pad guide (35 Nm)
- repairius.com 2020 Corolla torque specs (front slide pins 34 Nm / 25 ft-lb)
- sp-performance.com / HowToo 2021 Corolla (34 Nm)
- Wheel nuts 103 Nm, in a cross pattern, car on the ground.
Sources
- AUTODOC Corolla XII (E210) front pad guide (103 Nm, cross order)
- Toyota Corolla 2019 owner's manual (libble.eu copy: 103 N·m)
- wheelssize.com Corolla 2019+ (103 Nm)
- Corolla Hybrid (ZWE211) front disc minimum thickness 19 mm (also stamped on the disc).
Sources
- DBA front rotor for ZWE211R (283 x 22 mm, minimum 19 mm)
- Protex front rotor for Corolla ZWE211 1.8 Hybrid (22 mm, minimum 19 mm)
- Go gently for the first 150 to 200 km after new pads.
Sources
- AUTODOC Corolla XII (E210) pad guide (150-200 km)
- AUTODOC Golf 7 pad guide (same advice)
A guide, not advice on any one car. If in doubt, use a garage. NCT record and typical prices for this car. More DIY guides.